Basics of Audio Mixing: A Beginner's Guide
Basics of Audio Mixing: A Beginner's Guide

Understanding the Mixing Process
What is Audio Mixing?
Audio mixing involves adjusting and combining multiple audio tracks into a final stereo or surround sound product. This process includes balancing levels, panning sounds, equalizing frequencies, adding effects, and fine-tuning each element to fit within the overall mix.
Why is Mixing Important?
Mixing is crucial because it transforms a collection of individual recordings into a single, cohesive piece of music. A well-mixed track ensures that each element is clear, balanced, and contributes to the overall sound. It enhances the listening experience and prepares the track for mastering and distribution.
Setting Up Your Mixing Environment
Acoustic Treatment
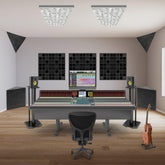
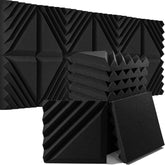
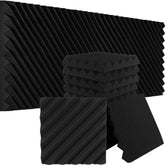
A proper mixing environment is essential for making accurate decisions. Use acoustic panels, bass traps, and other acoustic treatment materials to minimize reflections and create a balanced listening environment.
Monitoring
High-quality studio monitors and headphones are critical for accurate mixing. Studio monitors provide a flat frequency response, allowing you to hear the true sound of your mix. Headphones are useful for detailed listening and checking for issues like panning and effects.
Balancing Levels
Initial Balancing
Start by setting the levels of each track so that they are audible without overpowering each other. This initial balance is the foundation of your mix.
Using Faders
Use the faders on your mixing console or digital audio workstation (DAW) to adjust the volume of each track. Aim for a balance where the key elements, like vocals and lead instruments, are prominent, while supporting elements provide depth and texture.
Automation
Automation allows you to change the levels of tracks over time. Use automation to emphasize different parts of the song, such as bringing up the vocals during the chorus or lowering the volume of certain instruments during the verses.
Equalization (EQ)
Understanding EQ
Equalization is the process of adjusting the balance of different frequency components in an audio signal. It allows you to enhance or reduce specific frequencies to improve the overall sound of your mix.
Types of EQ
- Parametric EQ: Offers control over frequency, bandwidth, and gain. Ideal for precise adjustments.
- Graphic EQ: Uses fixed frequency bands with adjustable gain. Useful for broad adjustments.
- Shelving EQ: Boosts or cuts frequencies above or below a certain point. Commonly used on high and low frequencies.
Common EQ Techniques
- Cutting Unwanted Frequencies: Remove unnecessary low frequencies from instruments that don’t need them, such as vocals and guitars, to reduce muddiness.
- Boosting Key Frequencies: Enhance important frequencies, like adding presence to vocals around 3-5 kHz.
- Notching Problem Frequencies: Use narrow cuts to remove problematic frequencies, such as hums or resonances.

Compression
What is Compression?
Compression reduces the dynamic range of an audio signal, making quiet sounds louder and loud sounds quieter. This helps to create a more consistent volume level throughout the track.
How to Use Compression
- Threshold: Sets the level at which compression begins. Signals above this level are compressed.
- Ratio: Determines the amount of compression applied. A higher ratio results in more compression.
- Attack and Release: Control how quickly the compressor responds to the incoming signal and how quickly it stops compressing after the signal drops below the threshold.
- Makeup Gain: Boosts the compressed signal to make up for any volume loss.
Common Compression Techniques
- Vocal Compression: Apply gentle compression to even out the volume of vocals and make them sit better in the mix.
- Drum Compression: Use faster attack and release times to control the dynamics of drums and add punch.
- Parallel Compression: Blend a heavily compressed signal with the dry signal to maintain dynamics while adding consistency.
Adding Effects
Reverb
Reverb adds a sense of space and depth to your mix. Use it to simulate different environments, from small rooms to large halls. Apply reverb to vocals, drums, and other instruments to create a cohesive sound.
Delay
Delay creates an echo effect by repeating the audio signal after a set period. Use delay to add depth and interest to vocals and lead instruments. Adjust the timing and feedback settings to achieve the desired effect.
Other Effects
- Chorus: Adds thickness and richness to sounds by duplicating the signal and slightly detuning it.
- Flanger: Creates a sweeping effect by mixing the signal with a delayed copy that varies in delay time.
- Phaser: Shifts the phase of the audio signal to create a sweeping effect similar to a flanger.
Panning and Stereo Imaging
Understanding Panning
Panning involves placing each track within the stereo field, from left to right. Proper panning helps to create a sense of space and separation between instruments.
Panning Techniques
- Center Panning: Place key elements, like vocals and bass, in the center of the mix.
- Hard Panning: Pan some instruments fully to the left or right to create width.
- Subtle Panning: Slightly pan supporting elements, like backing vocals or rhythm guitars, to add depth and clarity.
Stereo Imaging
Use stereo imaging tools to widen or narrow the stereo field. This can enhance the spatial quality of your mix and make it sound more immersive.
Conclusion
Audio mixing is a blend of technical skill and artistic creativity. By understanding the basics of balancing levels, applying EQ and compression, adding effects, and using panning techniques, you can create professional-sounding mixes. Remember, practice and experimentation are essential to developing your mixing skills. With time and experience, you'll be able to craft mixes that are both technically sound and artistically compelling.
ABOUT AUTHOR
House Live Engineer of Free Bird, a live house with the history of South Korea's indie music scene.
Single album/Regular album/Live recording, Mixing and Mastering experience of various rock and jazz musicians


