Understanding Acoustic Basics for Your Studio
Understanding Acoustic Basics for Your Studio

To achieve a professional-quality sound in your home studio, it’s crucial to understand the basics of acoustics. Acoustic treatment isn’t just about soundproofing; it’s about controlling how sound behaves in your space to create a balanced listening environment. By grasping the fundamentals of acoustics, you can make informed decisions on where to place treatment materials and create a space that enhances your recordings and mixes.
How Sound Behaves in a Room
When sound is produced in a room, it interacts with surfaces such as walls, floors, and ceilings. This interaction creates reflections, standing waves, and resonances, all of which affect the quality of the sound you hear. Unlike open outdoor spaces, where sound dissipates freely, indoor spaces reflect sound, causing it to bounce around the room. Here are a few key acoustic phenomena that impact a studio’s sound quality:
- Reflections: Sound waves bounce off surfaces, creating reflections. These reflections can interfere with direct sound from your speakers, causing comb filtering and reducing clarity. The goal of acoustic treatment is to control these reflections for a clearer sound.
- Standing Waves: Standing waves occur when sound waves reflect between parallel surfaces, such as two walls, creating peaks and nulls at specific frequencies. This can lead to an uneven bass response, with certain notes sounding louder or quieter than they should.
- Resonance: Every room has resonant frequencies, where certain sounds are amplified due to the dimensions of the room. Resonance can make specific notes overpowering and muddy, which is why bass traps are often necessary to control low-end buildup.
Why Acoustic Treatment Matters
Without acoustic treatment, the sound in your room can become colored by reflections, standing waves, and resonances. This makes it challenging to hear an accurate representation of your recordings or mixes. Acoustic treatment helps to control these issues, providing a more balanced and neutral listening environment. When you can trust the sound in your studio, you’ll make better mixing and production decisions, leading to a higher-quality end product.
Types of Acoustic Treatment
There are several types of acoustic treatment that can help you manage how sound behaves in your studio:
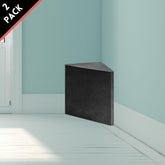
- Bass Traps: These are thick panels designed to absorb low frequencies, helping to control bass buildup in corners and other areas prone to low-end resonance. Bass traps are typically placed in the corners of the room, where bass energy is most concentrated.
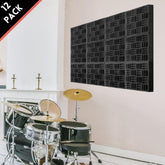
- Absorption Panels: Absorption panels are made from porous materials that absorb mid to high frequencies, reducing reflections and echoes. These panels are often placed on the walls to control sound reflections and improve clarity.
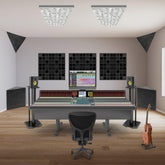
- Diffusers: Diffusers scatter sound waves, rather than absorbing them. This prevents standing waves and reduces echo without making the room sound “dead.” Diffusers are typically used on the back wall behind the listening area.

The Importance of Room Dimensions
The dimensions of your room play a significant role in its acoustic properties. Small, square, or rectangular rooms often have more acoustic problems because parallel surfaces amplify standing waves and resonances. Ideally, a room with uneven dimensions will produce fewer issues. If you’re limited to a square or rectangular room, the right combination of bass traps, absorption, and diffusion can help to minimize these challenges.
Reflective and Absorptive Surfaces
Different materials reflect or absorb sound in various ways. Hard surfaces like glass, concrete, or bare walls are highly reflective, which can cause excessive echoes and reflections. On the other hand, soft materials like carpets, curtains, and acoustic panels absorb sound, helping to reduce unwanted reflections. Understanding how these materials impact sound allows you to make informed choices on where to place absorptive and reflective elements for the best acoustic balance.
How to Get Started with Acoustic Treatment
Optimizing the acoustics of your room doesn’t have to be overwhelming. Here are a few steps to help you get started:
- Identify Problem Areas: Walk around your room while playing a low-frequency tone and note areas where bass buildup is most noticeable. These spots are ideal for placing bass traps.
- Focus on Reflection Points: Use a mirror to find the reflection points on your side walls where sound from the speakers reflects directly to the listening position. These points are where you should place absorption panels.
- Experiment with Diffusion: If your room sounds too “dead” after adding absorption, consider adding diffusers to scatter sound and create a more natural listening environment.
Conclusion
Understanding the basics of acoustics is the foundation of a well-optimized home studio. By learning how sound behaves in your space and addressing common acoustic issues, you can make significant improvements to the accuracy of your monitoring environment. This knowledge will guide you as you move forward with treating your room, ensuring that each adjustment you make enhances the quality of your recordings and mixes.
In our next post, we’ll cover how to choose the right room in your home for a studio setup and how to assess its acoustic potential.
ABOUT AUTHOR
House Live Engineer of Free Bird, a live house with the history of South Korea's indie music scene.
Single album/Regular album/Live recording, Mixing and Mastering experience of various rock and jazz musicians

