Optimizing Your Studio on a Budget
Optimizing Your Studio on a Budget

Building and optimizing a home studio doesn’t have to break the bank. With a little creativity and smart decision-making, you can create a professional-sounding space without overspending. Whether you’re working with limited funds or simply want to maximize your investment, this guide will help you achieve great results while keeping costs low.
Prioritize Your Studio Needs
Before making any purchases, take the time to identify your priorities. Focus on the elements that will have the biggest impact on your sound quality and workflow. For most home studios, this means prioritizing acoustic treatment, a reliable audio interface, and quality studio monitors.
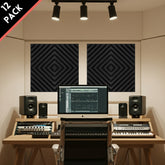
- Acoustic Treatment: Controlling reflections and bass buildup has a bigger impact on sound quality than expensive gear. Start with DIY bass traps and absorption panels if you’re on a tight budget.
- Core Equipment: Invest in a decent microphone, audio interface, and monitors before adding extra gear like MIDI controllers or outboard effects.
DIY Solutions for Acoustic Treatment
Acoustic treatment is essential for creating a balanced listening environment, but it can be costly. Fortunately, there are plenty of affordable DIY options:
- Bass Traps: Build your own bass traps using rigid fiberglass or rock wool. Frame the material and cover it with fabric for a professional look.
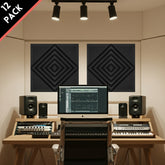
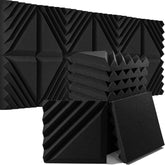
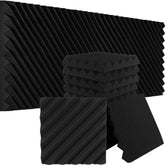
- Absorption Panels: Create wall-mounted panels using the same materials as bass traps. Place them at reflection points to reduce echoes and improve clarity.
- Rugs and Curtains: Use thick rugs on the floor and heavy curtains over windows to absorb sound and reduce reflections.
Shop Smart for Studio Gear
When it comes to equipment, you don’t need to buy the most expensive options to get great results. Here are some tips for saving money on studio gear:
- Buy Used: Look for used gear on online marketplaces like Reverb, eBay, or local music stores. Many pre-owned items are in excellent condition and cost significantly less than new gear.
- Start with Entry-Level Models: Many entry-level microphones, interfaces, and monitors offer excellent performance at a fraction of the cost of high-end options. Brands like Focusrite, Audio-Technica, and PreSonus are known for their quality budget gear.
- Wait for Sales: Watch for seasonal sales, such as Black Friday or back-to-school deals, to score discounts on studio equipment.
Multi-Purpose Equipment
Stretch your budget by choosing versatile gear that can serve multiple purposes. For example:
- Multi-Pattern Microphones: A microphone with switchable polar patterns (e.g., cardioid, omnidirectional, figure-eight) can be used for vocals, instruments, and room recordings.
- Monitor-Headphone Combo: Use headphones for critical listening and mixing if you can’t afford studio monitors initially. Closed-back headphones like the Audio-Technica ATH-M40x are an excellent choice.
Free and Affordable Software
Professional-quality software doesn’t have to come with a hefty price tag. Many free or affordable options can handle recording, mixing, and production tasks:
- Free DAWs: Software like Cakewalk by BandLab or Tracktion Waveform Free offers powerful tools for recording and editing without any cost.
- Affordable Plugins: Look for budget-friendly plugin bundles or free plugins from trusted developers like Spitfire Audio, Valhalla DSP, and iZotope.

Maximize Your Existing Space
Instead of spending money on renovations, work with what you already have to improve your studio:
- Declutter: Remove unnecessary furniture and items that could interfere with sound reflections or take up valuable space.
- Rearrange: Experiment with the placement of your desk, monitors, and acoustic panels to find the most effective setup without spending a dime.
Upgrade Gradually
Optimizing your studio is an ongoing process, and there’s no need to buy everything at once. Start with the essentials and add more gear and treatment as your budget allows. This gradual approach ensures you’re investing in high-quality items rather than rushing to fill your studio with lower-quality equipment.
Conclusion
Creating a high-quality home studio on a budget is entirely achievable with the right approach. By prioritizing your needs, embracing DIY solutions, shopping smart, and maximizing your existing space, you can build a studio that supports your creative goals without overspending. With a bit of patience and planning, your budget-friendly studio can deliver professional results.
In the next post, we’ll explore the differences between soundproofing and acoustic treatment, helping you decide when and how to address each in your home studio.
ABOUT AUTHOR
House Live Engineer of Free Bird, a live house with the history of South Korea's indie music scene.
Single album/Regular album/Live recording, Mixing and Mastering experience of various rock and jazz musicians

