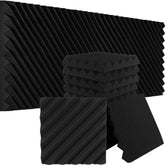
DIY Acoustic Treatment: Effective Solutions for Your Home Studio
DIY Acoustic Treatment: Effective Solutions for Your Home Studio
Crafting Your Sound Space with Practical, Affordable Methods
In the quest for pristine audio quality, acoustic treatment stands out as a crucial aspect, especially for home studio enthusiasts and aspiring sound engineers. However, the cost of professional solutions can be daunting. Fear not, as this comprehensive guide will walk you through effective DIY acoustic treatment methods, ensuring your home recording sessions yield top-notch sound without breaking the bank.
Introduction: The Importance of Acoustic Treatment in Home Studios
A well-treated room is essential for accurate sound recording and mixing. This guide is dedicated to helping you understand and implement effective, affordable DIY acoustic treatment solutions to enhance the sound quality of your home studio recordings.
1. Understanding Acoustics in Your Space
Before you start building or buying acoustic panels, it’s crucial to understand the basics of room acoustics.
Assessing Your Room
Learn how to assess the acoustic characteristics of your room, identifying common problems like echoes, reverberations, and standing waves.
Principles of Sound Absorption and Diffusion
Understand the difference between sound absorption and diffusion and why both are important for achieving balanced room acoustics.
2. DIY Acoustic Panels: Absorbing Unwanted Echoes
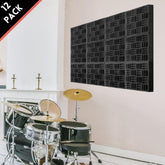
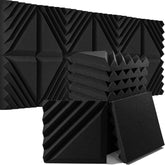
Acoustic panels are vital for absorbing unwanted echoes and reverberations. They can be surprisingly easy and affordable to create.
Building Your Own Acoustic Panels
Step-by-step instructions on how to build effective acoustic panels using readily available materials such as rockwool or Owens Corning 703.
Placement Strategies for Maximum Effectiveness
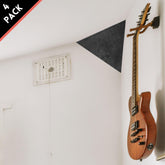
Discover the best strategies for placing these panels in your room to tackle common acoustic issues effectively.
3. Bass Traps: Controlling Low Frequencies
Low-frequency sounds can be particularly troublesome in smaller rooms, leading to muddy sound quality.
Constructing DIY Bass Traps
Learn how to construct bass traps that can efficiently absorb low frequencies, using materials like mineral wool or fiberglass.
Strategic Placement of Bass Traps
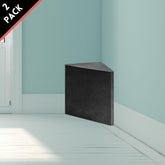
Understand where to place bass traps in your studio for optimal control of low-frequency sound waves.

4. Diffusion: Adding Clarity to Your Sound
Diffusion helps in scattering sound waves, adding clarity to your audio by reducing flutter echoes and hotspots.
Crafting DIY Diffusers
Instructions on building simple yet effective diffusers, using materials like wooden blocks or diffuser panels.
Ideal Locations for Diffusers
Learn about the best locations to place diffusers in your studio to achieve a more natural and open sound.
5. Monitoring and Fine-Tuning Your Acoustic Treatment
Effective acoustic treatment requires continual monitoring and adjustment.
Using Measurement Tools
Explore tools like microphones and software for measuring room acoustics, helping you fine-tune your treatment.
Iterative Process of Improvement
Understand that achieving perfect acoustics is an iterative process, requiring constant assessment and adjustments.
6. Conclusion: Elevating Your Home Studio's Sound
Implementing DIY acoustic treatment is a rewarding journey that can significantly elevate the sound quality of your home recordings. By following these steps, you can create a sonically pleasing environment that rivals professional studios, ensuring your recordings are crisp, clear, and true to sound.
ABOUT AUTHOR
House Live Engineer of Free Bird, a live house with the history of South Korea's indie music scene.
Single album/Regular album/Live recording, Mixing and Mastering experience of various rock and jazz musicians

