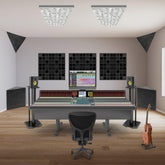
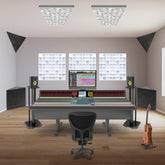
The Ultimate Guide to Home Studio Setup
The Ultimate Guide to Home Studio Setup

Introduction
Creating a home studio can be a game-changer for musicians, podcasters, and aspiring sound engineers. Whether you're recording music, voice-overs, or podcasts, a well-set-up home studio allows you to produce high-quality audio content from the comfort of your own home. In this guide, we will walk you through the essential steps to set up your home studio, covering everything from choosing the right equipment to optimizing your space for the best sound quality.
1. Selecting the Right Room
Choosing the right room for your home studio is the first crucial step. Ideally, you want a space that is quiet and free from external noise. Consider the following factors:
- Room Size and Shape: A larger room with irregular shapes can help in reducing sound reflections and standing waves.
- Location: Avoid rooms with a lot of external noise (e.g., near busy streets).
- Acoustics: Rooms with carpets, curtains, and soft furnishings can help absorb sound and reduce echo.
2. Essential Equipment for Your Home Studio
To produce high-quality audio, you'll need to invest in some essential equipment. Here's a list of must-have items:
- Computer: A reliable computer with sufficient processing power and storage.
- Digital Audio Workstation (DAW): Software like Pro Tools, Logic Pro, or Ableton Live.
- Audio Interface: Interfaces like Focusrite Scarlett or PreSonus AudioBox for connecting microphones and instruments to your computer.
- Microphones: A good quality condenser microphone for vocals and dynamic microphones for instruments.
- Headphones and Studio Monitors: High-quality headphones and monitors for accurate sound reproduction.
- MIDI Controller: For creating and controlling digital instruments.
3. Acoustic Treatment
Acoustic treatment is essential for creating a professional-sounding studio. This involves managing reflections, echoes, and sound absorption:
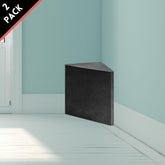
- Bass Traps: Placed in corners to absorb low-frequency sounds.
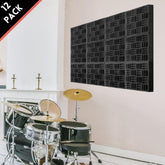
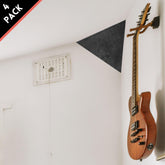
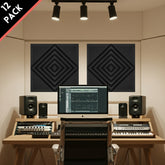
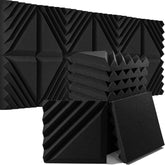
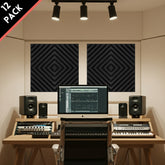
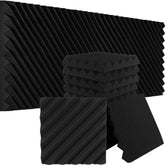
- Acoustic Panels: Placed on walls to absorb mid to high frequencies.
- Diffusers: Used to scatter sound waves, reducing echoes and reflections.

4. Soundproofing
To prevent sound from leaking in or out, consider soundproofing your studio. Here are some tips:
- Seal Gaps: Use weather stripping or acoustic sealant to close gaps around doors and windows.
- Add Mass: Use heavy materials like drywall, mass-loaded vinyl, or soundproof curtains to add mass and block sound.
- Isolate: Use isolation pads for monitors and instruments to reduce vibrations.
5. Setting Up Your Equipment
Proper setup of your equipment is crucial for an efficient workflow:
- Desk and Chair: A comfortable chair and a sturdy desk at the right height.
- Monitor Positioning: Place monitors at ear level and form an equilateral triangle with your listening position.
- Cable Management: Keep your cables organized to prevent clutter and interference.
6. Optimizing Your Workflow
A well-organized studio enhances productivity:
- Label Everything: Label cables, inputs, and settings to save time.
- Templates: Create DAW templates for different types of projects.
- Backup: Regularly back up your work to prevent data loss.
Conclusion
Setting up a home studio requires an initial investment of time and money, but the benefits are immense. With the right equipment and a well-treated space, you can produce professional-quality audio content. Remember, the key to a successful home studio is not just the gear but how you use it. Experiment with different setups and find what works best for you. Happy recording!
ABOUT AUTHOR
House Live Engineer of Free Bird, a live house with the history of South Korea's indie music scene.
Single album/Regular album/Live recording, Mixing and Mastering experience of various rock and jazz musicians

