Microphone Types & Techniques: A Beginner’s Guide for Home Studios
Advanced Guide to Microphones and Recording Techniques for Your Home Studio

The Single Most Important Rule: Source, Room, Not Price
You might assume that the most expensive microphone is the best choice, but for recording professionals and home studio musicians alike, the ultimate rule is simple: Choose the microphone based on your sound source and, most critically, your room acoustics, not the price tag. Mastering the right microphone type, understanding its polar pattern, and employing smart placement rules can instantly elevate your sound without buying new gear. This comprehensive guide will walk you through the essential knowledge, from the key differences between microphone types to advanced phase-avoidance and gain staging techniques.
Microphone Fundamentals: Which Type for Which Job?
Microphones are transducers that convert sound energy into electrical signals, but their internal mechanisms vary significantly, making each type uniquely suited for specific recording tasks. Dynamic Microphones
These mics use a simple moving coil and diaphragm, making them inherently rugged and excellent at handling high sound pressure levels (SPL) from sources like loud drums or guitar amps. Crucially for those dealing with noisy home environments or an untreated room, they possess a low sensitivity which helps them naturally reject much of the unwanted room noise. They are perfect for close-miking loud sources or recording robust vocals in a reflective space. Example: The industry-standard Shure SM57 or Shure SM58. Condenser Microphones
Condensers are highly sensitive, using a charged diaphragm and backplate. This design offers the widest frequency response and greatest detail, capturing the air and nuance that make them the preferred choice for studio vocals, acoustic instruments, and drum overheads. They require external phantom power (+48V) and, due to their high sensitivity, they will capture every reflection and reverb from an untreated room. If your space has excessive flutter echo or early reflections, a dynamic mic may be a safer choice until your room is acoustically prepared. Example: The popular beginner-friendly Audio-Technica AT2020 or the low-noise Rode NT1-A. Ribbon Microphones
Featuring a thin metal ribbon suspended in a magnetic field, ribbon mics are prized for their smooth, "natural," and vintage tone, often used on brass, woodwinds, and electric guitar amps. Most older passive models have a bidirectional (Figure-8) pattern and are extremely delicate—never apply phantom power to vintage passive ribbon mics as it can damage the ribbon.
Polar Patterns: Aim the Mic, Shape the Sound
The polar pattern describes a microphone's directional sensitivity—where it listens and where it rejects sound, a critical factor in combating a bad room sound. Cardioid (Heart-Shaped)
This pattern is the workhorse of the home studio, isolating a source like a vocal or guitar by being most sensitive at the front and heavily rejecting sound from the rear. Omnidirectional (All Directions)
An omni mic captures sound equally well in all directions. Use it to capture natural room ambience or an ensemble, and note that it minimizes the Proximity Effect, which can be advantageous when close-miking. Bidirectional (Figure-8)
It picks up equally from the front and back while strongly rejecting sounds from the sides. This is essential for advanced stereo techniques like Mid-Side (MS) recording or for recording two facing sources.

Placement That Just Works: Essential Mic Techniques
Small changes in microphone distance and angle yield massive results in recording quality. Vocal Setup: Distance, Off-Axis, and Gain Staging
Start by placing the singer 6 to 10 inches (15–25 cm) from the mic. Always use a pop filter 2 to 3 inches from the mic capsule. Position the mic slightly off-axis (aiming slightly away from the mouth) to soften sibilance and reduce breath noise. In terms of gain, ensure your pre-amp has enough clean gain to capture the signal robustly without introducing noise; aim for your loudest peaks to land around -6 to -10 dBFS in your DAW, giving you sufficient Headroom for mixing. Acoustic Guitar: Avoiding the Boom
Do not aim the mic directly at the sound hole; this captures excessive, boomy low frequencies. Instead, start about 12 inches (30 cm) away, aiming at the point where the neck meets the body (around the 12th fret) for a balanced tone. Guitar Amps: Balancing Tone
For recording an electric guitar amp, use a dynamic microphone (like the Shure SM57) positioned very close to the speaker cone. Moving the mic from the center of the cone (brighter sound) toward the edge (darker sound) will instantly fine-tune the tone.
Using Multiple Mics Without Phase Pain: The 3:1 Rule
When recording with multiple microphones, you risk phase cancellation, which causes certain frequencies to disappear, resulting in a thin, weak sound. To prevent this common home studio mistake, apply the 3:1 Rule: If the closest microphone (Mic A) is 1 foot away from its source, the second microphone (Mic B) must be placed at least 3 feet away from the first microphone. Always check your recording in mono; if the sound thins out, you have a phase issue, and you can correct it by flipping the phase/polarity switch or slightly adjusting the track timing in your DAW.
Crucial Advice: Invest in Your Room for Superior Sound
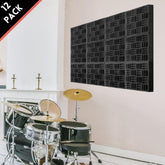
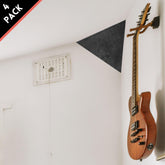
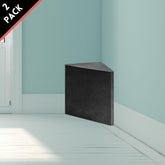
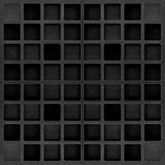
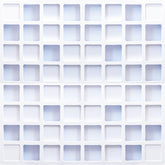
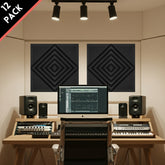
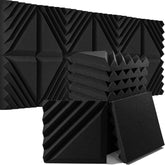
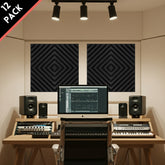
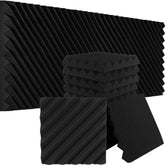
The single most common mistake in home recording is spending a majority of the budget on a high-end microphone while neglecting the acoustic environment. Your microphone can only capture the sound the room gives it. For a truly professional recording: If you have $1000 to spend, allocate $500 to a good microphone and $500 to acoustic treatment. A $500 microphone in a well-treated room will always sound better than a $1,000 microphone in an untreated room filled with reflections and bass build-up. Acoustic Treatment Strategies with Foroomaco: * Mid-High Frequency Control (Early Reflections): To combat early reflections and harsh flutter echo, place acoustic panels (like the Foroomaco Grid Style Acoustic Panels) at primary reflection points on the side walls, ceiling, and behind the listening position. * Low Frequency Control (Bass Traps): Low-end boominess is the hardest problem to solve in small home studios. Use bass traps (such as the Foroomaco Triangular Pyramid Bass Traps or Delta Bass Traps, designed for Trihedral and Dihedral corners respectively) installed in the room corners to effectively reduce low-end wavelengths and tighten up the entire mix. * Sound Field Texture (Diffusers): For a natural, diffused sound field that prevents the room from sounding "dead," consider using diffusers like the Foroomaco Waffle Diffusers on the rear wall. These break up sound waves to maintain energy while eliminating destructive reflections.
Frequently Asked Questions (FAQ)
Q: How do I handle a dynamic microphone like the Shure SM7B in my home studio?
A: The Shure SM7B is an exceptional mic, but it has a very low output, requiring a lot of clean gain. If you are using a standard budget audio interface, you will almost certainly need an inline preamp (often called a 'fethead' or 'cloudlifter') to provide the clean, additional gain required to make the mic sound robust without introducing pre-amp noise. This is essential for achieving a high-quality signal-to-noise ratio.
Q: What is the Proximity Effect and how do I control it?
A: The Proximity Effect is the natural phenomenon where directional microphones (Cardioid, Figure-8) exhibit a boost in low-frequency response when they are placed very close (typically under 8 inches) to the sound source. To control this, simply increase the distance to 8–12 inches (20–30 cm), or use a gentle high-pass filter (HPF) on your pre-amp or DAW channel to clean up excessive low end.
Q: What is the easiest stereo miking method for a beginner?
A: The XY technique is the most mono-compatible and forgiving. It uses two directional (cardioid) microphones placed with their capsules close together, usually at a 90-degree angle. This creates a focused stereo image and virtually eliminates phase problems, making it ideal for recording acoustic guitar or drum overheads in a beginner setting.
ABOUT AUTHOR
House Live Engineer of Free Bird, a live house with the history of South Korea's indie music scene.
Single album/Regular album/Live recording, Mixing and Mastering experience of various rock and jazz musicians

