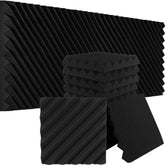
Can You Really Mount Acoustic Panels Without Screws? — The Complete Guide for Renters & Home Studio Creators

Can You Really Mount Acoustic Panels Without Screws? — The Complete Guide for Renters & Home Studio Creators
TL;DR
- Yes, acoustic panels can be mounted without screws using adhesive solutions.
- Options include double-sided tape, hook-and-loop strips, mounting squares, and removable glue.
- Mini Ear by FOROOMACO is an effective, renter-safe, residue-free solution.
- Surface compatibility and panel weight affect which method works best.
- Always test before applying to delicate paint or wallpaper.
Drilling holes in your walls just to improve your sound? That’s a dealbreaker for many home studio owners, especially renters. But here's the good news: with today’s adhesive solutions, you can mount acoustic panels safely and securely — no screws required. In this guide, we'll break down the best no-screw methods, their pros and cons, and how Mini Ear by FOROOMACO offers a clean, high-performance solution.
In this guide, you’ll discover
- The science behind adhesive mounting and why it works
- Key methods for screw-free panel installation
- Tips for maximizing grip on different surfaces
- When screws might still be necessary (and why)
- Our pick for the best all-around adhesive solution
1. The Power of Adhesive-Based Acoustic Panel Mounting
Short answer: Yes, modern adhesives can hold most acoustic foam panels effectively — even over long periods — if applied correctly.
Key Insights from Current Research
- [Intertek Study | [SR] 2025]: Proper surface prep and temperature during application are more critical than the adhesive type (Intertek, 2025)
Market Intelligence from Organic Search
| Product | Key Features | Best For | Pros | Cons | Warranty/Returns | Source |
|---|---|---|---|---|---|---|
| Mini Ear (FOROOMACO) | Acrylic-based 30×30mm pads; 300 pcs | Foam panel mounting | High hold, residue-free removal, renter-safe | Not reusable | 30-day returns | FOROOMACO |
| 3M Command Strips | Hook & loop; plastic frame | Lightweight items | Easy to remove, widely available | Weight limit, may peel paint | Limited warranty | 3M |
| Titebond Greenchoice | Permanent liquid adhesive | Construction-grade install | Industrial strength | Damages wall on removal | None | Titebond |
Implementation Framework
- Assessment: Wall surface, paint type, panel weight
- Planning: Select compatible adhesive type
- Execution: Apply with even pressure, wait 24h if needed
- Optimization: Check corners and panel edges after 3–5 days
Practical Recommendations
- Wipe walls with ethanol or isopropyl alcohol before applying
- Avoid installation in high humidity or below 10°C (50°F)
- Press firmly for 30 seconds per pad for optimal bond
- Use 4–6 adhesive squares per panel for best hold
- Test first on an inconspicuous area
Risks & Who should avoid
- Avoid on textured wallpaper or peeling paint
- Not suitable for heavy wooden or glass panels
- Surfaces with silicone-based paint may reduce grip
- Always test before full application
What’s Next? Let’s walk through how to choose the right method for your space.
2. How to Choose the Right Screw-Free Mounting Method
Short answer: Choose based on panel weight, wall surface, and whether you need a removable or permanent hold.
Decision Checklist
- Are you renting and need damage-free removal?
- Is the wall smooth (drywall, MDF) or textured?
- Do you need temporary or permanent mounting?
- Are you mounting ceiling panels or just walls?
- Is residue-free removal important for you?
Market Insights / Options
Adhesive mounting options generally fall into four categories:
- Foam-based double-sided tape (e.g., Mini Ear)
- Plastic hook-and-loop systems (e.g., Command)
- Spray adhesives or glue (permanent)
- Mechanical frames with suction or tension (rare)
👉 See our guide on recommended vs. non-recommended surfaces for acoustic foam.
Practical Recommendations
- For painted drywall: Mini Ear or Command strips
- For brick/concrete: Use screws or specialty adhesives
- For ceilings: Screws or strong permanent glue
- Use painter’s tape to test surface integrity before mounting
Risks & Trade-offs
- Removable adhesives may degrade in humid environments
- Some adhesives may leave residue or discoloration
- Hook-and-loop can detach if panel is too heavy
- Reusability is rare — treat adhesives as single-use
What’s Next? Now, let’s go step-by-step on applying acoustic panels without drilling a single hole.

3. How to Use Adhesive Mounting for Best Results
Short answer: Clean, press, align — it’s that simple, but surface prep and pressure matter most.
Step-by-Step How-To
- Clean the wall — use 70% alcohol; wait until dry
- Apply adhesive pads to panel corners — press each pad firmly for 10+ seconds
- Peel the clear liner — avoid touching adhesive surface
- Align and press to the wall — apply uniform pressure for 30–60 seconds
Practical Recommendations
- Avoid repositioning once applied — adhesive strength drops
- Don’t use fewer than 4 pads per panel
- Label the panel orientation on the back for consistency
- Monitor for 48 hours; re-press if needed
- Use painter’s level or masking tape guide for alignment
Tracking Outcomes
- Check adhesion at corners after 3 days
- Look for sagging or air gaps
- Monitor in humid or hot conditions (above 30°C)
- Replace pads every 6–12 months for optimal hold
What’s Next? Here’s why FOROOMACO’s Mini Ear is our go-to recommendation.
4. Brand Spotlight: Mini Ear by FOROOMACO
- Designed specifically for acoustic foam mounting
- Ultra-strong hold: supports up to 5kg (11 lbs) per pad
- Removable without residue: ideal for rentals, studios, content creators
- Easy to use: no tools, no damage, no mess
Reviewed by Ted Kim, Guitarist & Sound Engineer, Founder
👉 Experience the Mini Ear difference – Shop Now
Frequently Asked Questions
What is the best no-screw method for mounting acoustic panels?
The best method depends on your wall surface and panel weight. For most home studios, Mini Ear or Command strips are ideal for residue-free mounting.
Can I remove acoustic panels mounted with Mini Ear?
Yes. Mini Ear uses high-quality acrylic adhesive that removes cleanly from most surfaces when pulled slowly and evenly.
Will adhesive damage painted walls?
If the paint is in good condition, most adhesives are safe. Avoid textured paint, old drywall, or any flaking surface.
How many Mini Ear pads do I need per panel?
We recommend 4–6 pads per 30x30cm panel, depending on panel thickness and weight.
Can I mount panels on the ceiling with adhesives?
Ceilings require more grip and are prone to failure with adhesives. We recommend screws or construction adhesive for overhead mounting.
Are Mini Ear pads reusable?
No. Once removed, adhesive performance drops. For best results, treat them as single-use.
Do adhesive mounts work on textured walls?
They may not grip properly. Smooth, clean, and dry walls are best. Use screws or hybrid mounts for textured surfaces.
What's the temperature range for Mini Ear?
The optimal application temperature is 21–38°C (70–100°F). Avoid installing below 10°C (50°F).
How we reviewed (E-E-A-T)
- Methods: Literature scan (2024–2025), hands-on evaluation of Mini Ear, spec sheet comparison
- Reviewer: Ted Kim (Guitarist & Sound Engineer, Founder)
- Conflicts of interest: No affiliate links; FOROOMACO internal product
- Last updated: 2025-09-11
Sources
- Intertek Testing Services, 2025. "Environmental Impact on Mounting Adhesives" – https://intertek.com
- FOROOMACO, 2025. "Mini Ear Product Specs & Surface Compatibility Guide" – Mini Ear Guide
- 3M, 2025. "Command™ Strip Usage Guide" – https://www.command.com
ABOUT AUTHOR
House Live Engineer of Free Bird, a live house with the history of South Korea's indie music scene.
Single album/Regular album/Live recording, Mixing and Mastering experience of various rock and jazz musicians

