Essential Acoustic Treatment: Bass Traps, Panels, and Diffusers
Essential Acoustic Treatment: Bass Traps, Panels, and Diffusers

Acoustic treatment is one of the most critical steps in optimizing your home studio. Without proper treatment, your room’s natural acoustics can interfere with your ability to hear and produce accurate sound. Three key tools for acoustic treatment—bass traps, absorption panels, and diffusers—can help you control unwanted reflections, reduce bass buildup, and create a balanced sound environment. In this guide, we’ll break down these essential treatments and explain how to use them effectively in your studio.
What is Acoustic Treatment?
Acoustic treatment focuses on controlling sound reflections within a room to improve the quality of what you hear. Unlike soundproofing, which blocks external noise, acoustic treatment improves the way sound behaves inside the room. By strategically placing bass traps, panels, and diffusers, you can create an environment that allows you to mix, record, and produce music with confidence.
Understanding the Three Types of Acoustic Treatment
Each type of acoustic treatment serves a specific purpose in managing sound within your studio:
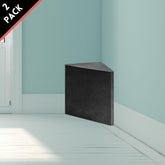
- Bass Traps: Bass traps are designed to absorb low frequencies, which tend to accumulate in corners and cause bass buildup. Without bass traps, your mixes may sound boomy or unbalanced. They are typically placed in the corners of the room where bass frequencies concentrate the most.
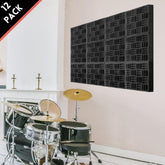
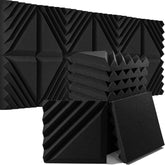
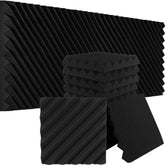
- Absorption Panels: Absorption panels are used to control mid and high frequencies, reducing reflections and echoes. These panels are usually made of porous materials like acoustic foam or fiberglass and are placed on walls, ceilings, or any surfaces where sound reflects directly toward the listening position.
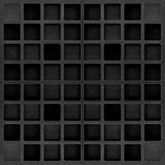
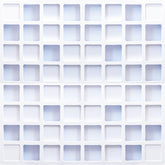
- Diffusers: Diffusers scatter sound waves instead of absorbing them, which helps to break up reflections without making the room sound “dead.” They are often placed on the back wall behind the listening position to create a more natural and spacious sound.
How to Use Bass Traps in Your Studio
Bass traps are essential for controlling low frequencies, which are harder to manage than mids and highs. Here’s how to use them effectively:
- Place in Corners: Low frequencies accumulate in corners, making them the most effective placement spots for bass traps. Place traps vertically in all four corners of your room for maximum impact.
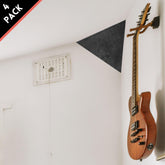
- Consider Wall-Ceiling Corners: If you’re dealing with significant bass buildup, adding bass traps where the walls meet the ceiling can provide additional absorption and improve overall low-frequency response.
- Use Broadband Traps for Versatility: Broadband bass traps absorb a wide range of frequencies, addressing both low-end issues and some midrange reflections, making them a versatile choice for home studios.
Using Absorption Panels for Clarity
Absorption panels are critical for reducing reflections that cause comb filtering and phase issues. Here’s how to integrate them into your studio:
- Target Reflection Points: Use a mirror to identify the first reflection points on your walls and ceiling. Place absorption panels at these locations to minimize sound bouncing back to your listening position.
- Cover Large Surfaces: Large, flat surfaces like walls and ceilings reflect sound more than textured or irregular surfaces. Placing panels in these areas reduces echo and improves clarity.
- Balance Absorption: Avoid over-treating your room with absorption panels, which can make the room sound too “dead.” Leave some untreated areas for natural reflections.

How to Use Diffusers for a Balanced Sound
Diffusers help to scatter sound waves evenly, reducing harsh reflections while preserving a sense of spaciousness. Here’s how to use them effectively:
- Place Behind the Listening Position: The back wall is an ideal location for diffusers, as this area often produces strong reflections that can interfere with the sound coming from your monitors.
- Combine with Absorption: Use diffusers in combination with absorption panels to achieve a balanced mix of direct and reflected sound. This creates a natural listening environment.
- Experiment with Placement: Diffusers come in various designs, such as quadratic residue or skyline diffusers. Experiment with placement and type to find what works best for your room’s acoustics.
Common Acoustic Treatment Mistakes to Avoid
While acoustic treatment is essential, there are some common mistakes to watch out for:
- Ignoring Low Frequencies: Many beginners focus only on mid and high frequencies, neglecting the low end. Bass traps are a must for addressing low-frequency buildup, which can significantly impact the accuracy of your mixes.
- Overusing Absorption: Using too many absorption panels can make your room sound unnatural. Aim for a balance between absorption and diffusion to maintain a lively sound.
- Improper Placement: Acoustic panels and bass traps need to be placed strategically to be effective. Random placement won’t solve your room’s acoustic issues, so plan your setup carefully.
Conclusion
Bass traps, absorption panels, and diffusers are the foundation of acoustic treatment in a home studio. By understanding the purpose of each and placing them strategically, you can transform your room into a professional-quality space for recording and mixing. Whether you’re addressing bass buildup, reducing reflections, or creating a natural sound environment, these tools will help you achieve accurate and consistent results.
In the next post, we’ll explore the differences between DIY acoustic treatment and professional solutions, helping you decide which option is right for your studio.
ABOUT AUTHOR
House Live Engineer of Free Bird, a live house with the history of South Korea's indie music scene.
Single album/Regular album/Live recording, Mixing and Mastering experience of various rock and jazz musicians

